|
#1
12-07-2007, 07:53 PM
|
||||
|
||||
|
A number of traders are not very careful when it comes to filtering VHS before putting it onto DVD. VHS-specific errors are transferred to the DVD, which looks sort of cruddy.
Ideally, you want to get a VCR and/or DVD recorder that tracks well, filters out grain,and removes chroma noise (it also helps to use s-video only, never coax or composite). If you don't, you leave VHS errors. This is how to remove them. It's just a few steps. 1. Open the video file in VirtualDub. Determine what filters are needed, and at what strength.
2. Once the filter chain is selected, it's time to look at other specialized errors. This video does not seem to have audio problems (typical VHS hiss). So I won't go into audio filtering here, just the video. However, this video had some tracking noise. It seems to have tracked decently, but it still was not perfect, and there's a lot of noise on bottom, more than mere overscan noise, and is likely to sneak on screen, which is ugly. We need to crop, but not how you might think.The goal is to take advantage of the overscan. The top of the picture is good, the bottom is bad. Resizing interlaced video results in blurring and noise, not good except in rare circumstances. What we'll be doing here is cropping off the existing overscan, plus the tracking errors. Then we'll move the image down, in multiples of two pixels, where only good image is shown on screen. Remember overscan and bleed when doing this, we don't want black edges to show on screen. The NULL TRANSFORM filter is used first, and cropping is selected. In this case, I cropped (in multiples of 2 pixels). There was 6 off each side, 4 on top, and 14 off bottom. That removed all the crap. Then I went and added the resize filter. The source was specified at the 340x362 left after the crop. The frame was then expanded to the 352x480 and filled with black. All done. 3. Finally, you encode. One way is to encode out to an uncompressed AVI, then open the AVi in your encoder and encode. I frameserve. AVISynth is installed, version 2.5, and then in VirtualDub I go to frameserve, use a one-word name ("moo" is what I used) and save the frameserve as moo.avs instead of the .vdr file it asks for. The vdr won't work, the avs is needed. VirtualDub shrinks into a tiny frameserver window. I open Procoder 2 (v1 does not work) and open the AVS file. Set up a custom MPEG project, generic MPEG, 352x480, with 2-pass VBR MPEG-2, 29.97fps, 5700 max, 3700 avg, 2000 min bitrates, top field first, 4:3 (make sure Procoder reads the source file as being top field with 4:3), audio as MP2 (MPEG Layer II) with 256k. High or Highest quality suggested, not the others. Mastering can look worse than Highest, so don't use it (fluke of PC2), High Speed has no quality to it. On a Intel P4 2.8Ghz with 400FSB, the encode frameserved takes 4x the length of the video (80 minutes encoding for 20 minutes of video). Newer computers will be faster. My Intel Core Duo laptop would probably be almost real-time. The encoded video has a little bit of mosquito noise left over, but I wouldn't want to filter it anymore. Older SDTV sets won't show it anyway, and newer HDTV sets with filters would remove it. Conclusion I know that was a lot of technical information, and you may have more questions. I've attached my copy of VirtualDub, with filters pre-loaded. Unzip it (RAR file) to C:\Program Files\VirtualDub A settings VCF file is also attached. Again, unzip (unRAR) it. Below are also the before and after video clips. Watch in VLC Media Player or burn to a DVD and watch on tv. PowerDVD and WinDVD would work too, but you may not see as many flaws or fixes with those softwares. VLC and on tv (author menu-less with TDA, burn to RW disc with ImgBurn) is best. Video sample downloads:
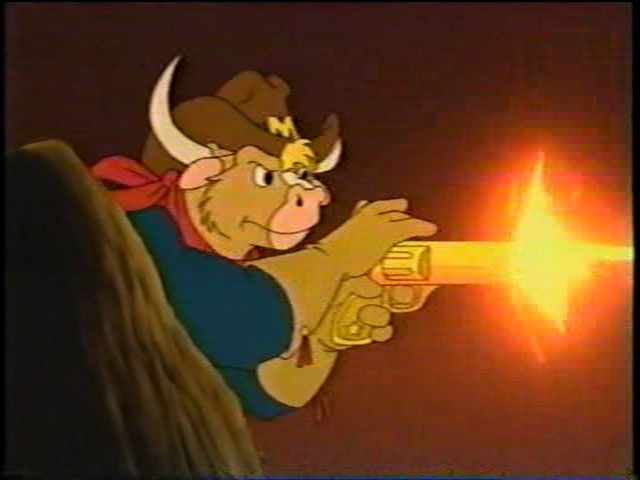
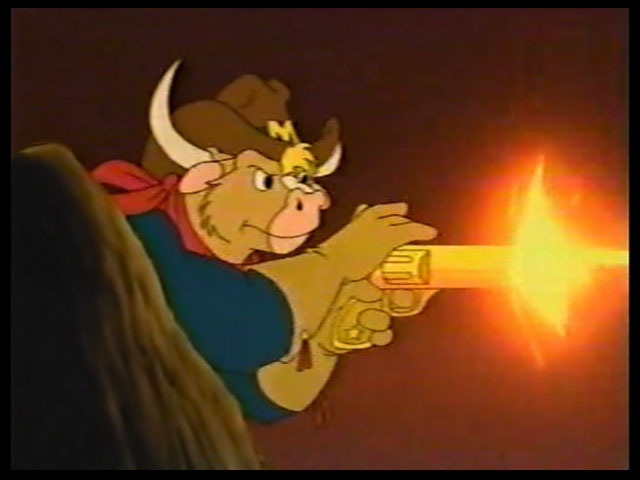
Quick images of before and after. You'll get a better idea watching the video clips, the still mostly show deblocking and NR, not the chroma fixes. Before:  After:  Feel free to ask questions, I'll answer as time allows. I don't want to be the only person who does (or can) restore video, so I'm trying to teach my methods to as many folks as I can. It'd be great to see this show restored, I'm hoping konfusion will tackle it. The same methods can be applied to the Munsters Today set, for the video. The audio on that set will take another lesson. If any of Moo Mesa has audio hiss, I'll make a quickie guide for basic hiss removal (GoldWave and SoundForge, used in tandem, gives the very best results). Munsters Today requires a much harsher audio filter set, yet another separate lesson.
__________________
The LS Collection:. My Cartoon and TV Show List | My Want List | My Future Projects |
|
#2
12-08-2007, 04:53 AM
|
||||
|
||||
|
ok lol i like how it cleared it up ill do it. i also have all but 3 episodes of monsters today so if i can get the 3 episodes from ji3 then i can do all of it.
|
|
#3
12-08-2007, 04:54 AM
|
||||
|
||||
|
is this the exact guide i need for the set?
|
|
#4
12-08-2007, 06:54 AM
|
||||
|
||||
|
This guide will work for Moo Mesa perfectly. That VCF file was created for this set, just use it. The Munsters Today may or may not work here, but it's a starting point. Feel free to send me a sample clip, and I can create a custom VCF file for that project.
__________________
The LS Collection:. My Cartoon and TV Show List | My Want List | My Future Projects |
|
#5
12-08-2007, 11:37 AM
|
||||
|
||||
|
also on the chroma settings to 25% is it luma, chroma1, or chroma2 that needs to be checked and at 25%
|
|
#6
12-08-2007, 12:04 PM
|
||||
|
||||
|
also whats vcf?? open that up in what?
im totally lost right here. i made it to this point. then open the AVi in your encoder and encode. I frameserve. AVISynth is installed, version 2.5, and then in VirtualDub I go to frameserve, use a one-word name ("moo" is what I used) and save the frameserve as moo.avs instead of the .vdr file it asks for. The vdr won't work, the avs is needed. VirtualDub shrinks into a tiny frameserver window. whats my encoder? vdub or what? |
|
#7
12-08-2007, 02:45 PM
|
||||
|
||||
|
The VCF file is a VirtualDub processing settings file. In VirtualDub, go to File > Load Processing Settings. It will load my filter settings for the project. This is how you save filter sets for later.
The luma needs to be left alone on the Chroma NR filter. The Chroma both need to be set to 25% with a wide pass. Procoder 2 is the encoder. You have to unzip the VirtualDub I gave you up top. Then install Procoder 2. Then you must install AVISynth v2.5 of higher (Google for it). Once that is done, and the computer is reset, you load the VirtualDub video and filters, and go to File > Start Frame Server. It wants a name. It doesn't matter, just make it a single word. Then it asks to save a file. It wants to save as a .vdr file, but if you rename it to filename.avs, it will save as the .avs file you need. You can't use .vdr files for anything anymore, not these days.
__________________
The LS Collection:. My Cartoon and TV Show List | My Want List | My Future Projects |
|
#8
10-16-2009, 05:01 AM
|
||||
|
||||
|
can u re add the files that were attached to this? im trying to do the clean up but i noticed the vcf and other files are now gone.
thanks |
|
#9
10-16-2009, 08:31 PM
|
||||
|
||||
|
Okay, I've updated the guide!

__________________
The LS Collection:. My Cartoon and TV Show List | My Want List | My Future Projects |
|
#10
10-16-2009, 10:32 PM
|
||||
|
||||
|
thank you. i ended up going to the old site and downloading it. it is going pretty fast too with a new computer so shouldnt be that much longer. just wish that i could find the 1 missing episode
|
 |
 Similar Threads
|
||||
| Thread | Thread Starter | Forum | Replies | Last Post |
| Gumby Essentials DVD Set to Restore and Remaster | wayshway | Superheroes, Cartoons and Anime | 2 | 04-18-2014 09:47 AM |
| VCD to DVD conversions-question? | MagnificentMarcus | Record TV: Video Tech Support | 11 | 09-05-2006 01:38 PM |
All times are GMT -6. The time now is 08:29 PM — vBulletin Copyright © Jelsoft Enterprises Ltd


